Saturday, January 28, 2012

Corded Petticoat: Complete


So here it is and I'm not completely pleased with the outcome. But lets be honest, who is ever completely satisfied? In the end I technically finished it twice. After going with the outline I found the petti was considerably wider than I had anticipated. So I took the waistband off and cut out around 15 in. Hmmm thinking that might have been too much.

But I did that because I didn't want it to :
1) Cave in on it's self or
2) get caught up in my legs when walking.

I did 37 lines of cording in all. The entire process of sewing in the cord was super easy but extremely boring.  This for sure is a project that I wouldn't mind revisiting in the future to make improvements to.

But after walking around it in for a few minutes it doesn't seem so bad. I'll have to wait and see how it holds up under a few more layers.

Monday, January 23, 2012

Corded Petticoat

Right well I'm heading into unknown territory to tackle the corded petticoat. I have no sewing directions except for an outline, I don't really see the point of waiting a week to get a book that tells me how to do this. So basically I know where I want to go, I'm just not sure how I'll get there.

I ran across this type of yarn a few times while checking out what other people had used. Its basically used for making dish cloths and its most likely 1/8 of an inch. I also nabbed 3 yards of 45 inch wide muslin and cut that into 2, 48 inch wide pieces. Which was stupid really I could have saved myself the seam by just hacking off a few inches from one end.
And so I turned up 2 inches at the bottom and inserted the yarn, using my zipper foot to sew as close as I could.

 I sewed in the yarn in rows until I ran out of turned up fabric. Thus creating the corded hem.

I haven't really figured out a plan of attack for how far apart and how many lines I'll add. But from what I have seen and read the cords should end below your hips. I may also shorten up the width to try and keep the amount of fabric at my waist down.

Europe 1830 - 35. Interesting how the piece is shown with the stays over the petticoat. Correct or incorrect?

 While trolling I came across this corded petticoat in the LACMA image gallery. There are some really great pieces to see and the zoom feature is fantastic and it also offers multiple views of the items. I was able to count individual threads in a closeup photo of an apron with embroidery. 


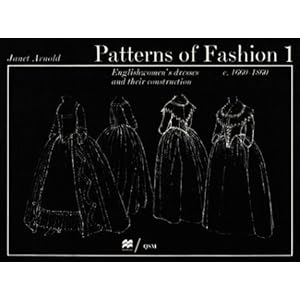
I found another one also being dated 1830's - unknown in my KCI fashion book and its shown here in their digital gallery. I counted the cording lines and I believe there were 62. Once again a great zoom feature.

Sunday, January 22, 2012

Laughing Moon Mercantile: #100 Ladies Victorian Underwear Completed

I've finished the Corset, chemise and open drawers from this pattern a few days ago. Already I'm not liking the fit of the chemise and wishing I had gone down a size in the corset. But hindsight is 20/20 and if I didn't make mistakes like this I'd have to change the name of the blog. So here we are...

I decided to not include the other pics I have of the chemise and drawers. Lets just say I want to keep things PG. The chemise for some reason rubs in the yoke area and really irritates my skin. I'm unsure if its the fabric choice or because I have sensitive skin. Either way I thought it was a pain in the butt to make and I like my other regency chemise a lot better.
The corset on the other hand is extremely comfortable to wear. I can sit, stand, and bend over all in comfort. My only hesitation about it is that I could swear that I can feel things in my abdomen shift back into their natural place after I take it off. Little creepy...

Sunday, January 15, 2012

Laughing Moon Corset: Back from the drawing board

I went back and re-cut the muslin for this corset with a smaller bust gusset and it turned out pretty good. I also padded my dress form more appropriately to more accurately represent the fluff. ;)

  There will need to be some trimming done at the end before they are bound otherwise they might just be about an inch too long.

I have to make sure to keep that two inch lacing gap it calls for. I'm currently trying to lessen my fluffiness and would like to keep this corset and not have to cannibalize it to make a smaller one.

I sewed all day yesterday...well it felt like all day...and I only ended up completing the busk insertion and preparing the back for grommet placement. I was so worked up about not making any huge mistakes. I did end up having to re-cut some fabric for one half of the front piece. Before starting I skipped over to Joanne's for some better fabric for the outside layer and snagged some twill on sale, the back layer in cotton duck.


Friday, January 13, 2012

Laughing Moon Mercantile: #100 Ladies Victorian Underwear

Here is the Dore Straight Seam corset and the Silverado Bust Gore corset from Laughing Moon Mercantile. For this project I'll be using the Silverado style. The particular pattern was bequeathed to me by my mom she never did have the opportunity to make this so I'm giving it a go. Here is my mock up on the dress form.


Please do excuse the pink sports bra, I wanted to add a little in the bust department. But anyway I'll say right off the bat that the pattern was fairly easy to understand and it went together very quickly. But after I tried it on I've realized that I for sure didn't need a size D bust gore and the overall pattern size may just be too big.


I moseyed on over to the Great Pattern Review  to check out what others had thought of the pattern. I did read a few comments that said the pattern did run slightly large. Also that if you intend to tight lace at all with the corset it would be best to add the optional hip gores as well, otherwise it tends to just squish things all over. I don't intend to tight lace but I do want to achieve a period correct shape. Hmm certainly food for thought. I'll be remaking the mock up with a smaller (size B or C) bust gore and using a smaller seam allowance to see if i can't remedy this.


My lovely Mother also gave me the busk and metal boning (Squee for actual metal boning!) she had purchased along with various other patterns and fabric. I'm sure those will eventually end up on the blog at some point.

Included in the pattern is a chemise and open drawers. Id like to see if I can take these on as hand sewing projects. To gently ease myself into that realm without blowing my mind completely.

Tricky Tricky

So recently I reordered Janet Arnolds Patterns of Fashion from the library to be able to trace some accurate patterns to enhance the authenticity of my costuming and it is literally doing my head in. I haven't the fainest clue where to start and being none too bright in the math department I'm just plain stuck. I figure here are my options for enlarging the patterns:

  • Buy an overhead projector (costly).
  • Spend hours staring at my computer using Photoshop Elements to possibly enlarge them (lots of ink and paper lost).
  • Or trace them by hand and hope that I get it right (time consuming and hit or miss).

I've done a small amount of perusal around the web and found one possibly helpful blog tutorial for the computer method but alas it isn't for Photoshop Elements. I went and purchased a cardboard version of a quilt cutting mat and am going to Joann's today in search of a s-curve ruler to draw all the lovely curves. If anyone has suggestions, instructions, or actual directions please do let me know.

                        *********************************************************

I've been on sort of a library book binge, requesting as many book on historical fashion as I can. Luckily the San Diego County Library is connected to the universities here and I've gotten some great books such as:

  • V&A Seventeenth and Eighteenth-Century Fashion in detail
  • Patterns of Fashion 1: English Womens Dresses & Their Construction 1660-1860
  • Fitting & Proper : 18th century clothing from the collection of the Chester County Historical Society
  • British Textiles : 1700 to the Present
  • Textiles in America, 1650-1870 
  • Corsets and Crinolines by Norah Waugh  


There are wonderful patterns, information and pictures contained within all of these books which make for excellent morning coffee time perusal.