Monday, September 1, 2014

Huntington Beach Civil War Days 2014

This event was super fun! My dress wore really well and was warm but not sweltering. Looking at it in this picture I feel I could maybe have gone without the ruffled petti.  
Sadly the only picture of my dress.


My little E and Mauma hanging out.
 
 The battle was very interesting and the cannon were amazing. The noise and smoke really made it feel real.


These guys sure had it rough. One of the camp followers asked a soldier how he was doing and he responded, "How do you think I'm doing? I feel like I'm wearing a blanket!"


One of the people watching the battle asked if I had a beau fighting. Silly. I'm hoping to make Jeff a uniform but he wants to be a rebel and I don't know if I'm ok with that. Maybe we will just be civilians for now.

I bought myself a watch as a souvenir. The woman who sold me this was really nice. I'm sad I didn't catch her name but if I happen to see her booth again I'll sure stop in.

Tuesday, August 26, 2014

1863 Sheer Dress

My current project is the 1863 Sheer Dress pattern from Truly Victorian. I'm using a beige plaid for the main fabric and a plum cotton for my piping and buttons. Having worked with TV patterns previously I was prepared for the method of sizing that is used. As per usual though my bust measure skewed my bodice front size and I had to take a shot in the dark on that. Happily I was correct in my choice and was able to move on from my muslin quickly.
 Please excuse my cell phone photos, my photographer was otherwise engaged with the baby.
After making a few small sizing adjustments I went ahead and cut into my fabric. I'd bought this bolt nearly two years ago and have been saving it for this project specifically. Since then Joann's had discontinued it. So if I flubbed it I was up sugar creek. Even though I'm not wearing or making a hoop, because I simply don't have the time, I will still need to omit one panel from the skirt to have enough fabric to finish.    
My corset was made prior to having my son and now my cups runneth over. The lining is stretched pretty tight but the outer fabric is doing alright.
 
I decided to change the sleeve cuff and add a button closure. The cuff  needed to be wide to get your hand through but it looked really bad. Having never done one without a pattern before it took some time to figure out. Well worth it. 
I have four days left to finish this and will need to sew like mad, or madder than I already am to get it finished. Just to get my mind organized I'll list it here.

To Do: 
  • Pipe and apply waistband.
  • Measure and cut skirt panels.
  • Sew skirt to bodice and hem.
  • Make and sew on buttons.

Thursday, August 21, 2014

1860ish Bonnet

To kick off the 1860s I whipped up a new bonnet to get me moving. I wanted to avoid any of my usual colors and went with some bolder choices. For me anyway.
To make this one instead of cutting out the shape I unraveled the straw hat, sewing on strips to get close to the shape I was aiming for.
And there she be.  I'm in love with the colors together and the flowers. I made this mostly from my stash. I purchased the ribbon and trim which I dyed. 

Tuesday, August 19, 2014

Madam Novice on FB


I've made a page for Madam Novice. How cool is that. Wow I'm so totally behind the times! https://m.facebook.com/MadamNovice

Wednesday, August 13, 2014

Elizabethan Kirtle: And other bits.

So to jump back on the costuming band wagon after my rather long hiatus, I set about sewing up some clothes to wear to the Ren Faire. I've been out of the game for so long and literally have no time to myself , so I'm really shocked that...I did it. And I think I did it well too. After much debate and a little research I decided to make a kirtle. Plain and simple without any frills. Granted it all started with some drooling over the idea of nobles clothing. You know the ever present, yet ever unattainable work of art. Le sigh. So after whittling down from a nobles costume to middle class merchant. I finally settled on a peasant costume.

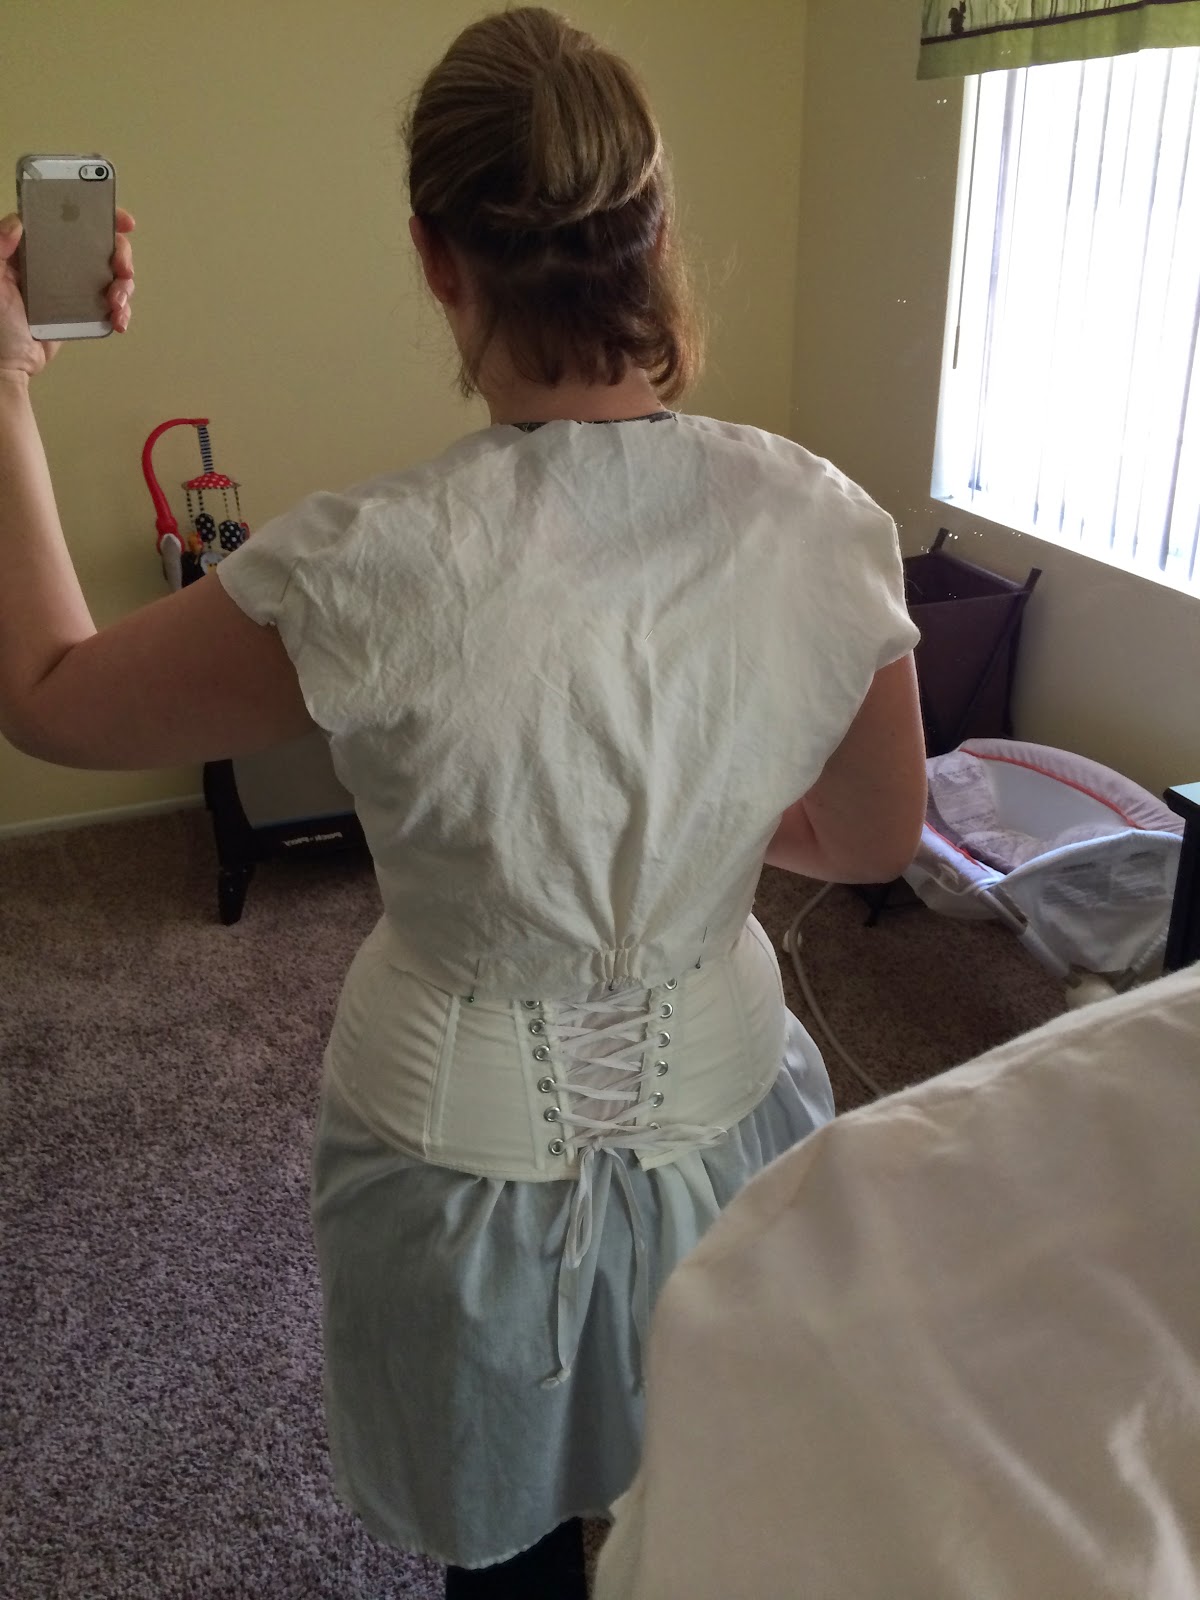
Let's start with the kirtle. Made from aprox. 8 plus yards of linen. This I'd had in my stash for about a year. Id tried to dye it brown but it wouldn't go dark enough. So I stripped the color and dyed it twice with navy blue dye and got gray fabric. Whatever, it worked. I used the patterns given to me by my Mom and made a simple bodice with a 6 gore skirt. I'd go with a rectangular skirt next time simply to make it easier.

Next I got out an old shift and threw some simple tube sleeves on it with a gusset. The issue with this is its made to go under an 18th century gown; this caused it to want to try and slip off my shoulders. Super not helpful. Solution? Tie it really tight.

Next!! Sleeves for the kirtle also made from linen.  This I purchased. It was on sale. I had the dye in my stash and dyed it twice to get....a rusty red? These are detachable and made from a pattern that I had to make. I used the directions from here. Super easy.

The partelet.  Made from flannel and linen that was purchased. Not on sale. But I had a coupon. I chose the flannel for two reasons. Number one wool is stupid expensive. Number two after watching a PETA video about sheep shearing in Australia I'm not buying from just anyone. This I used the directions from here again. But I used my pattern fom the Elegant Ladies Closet to give it the basic shape. The problem I encountered here, it's too long.  Eh.Whatever

My coif is a muffin cap. The directions com from a source on the 
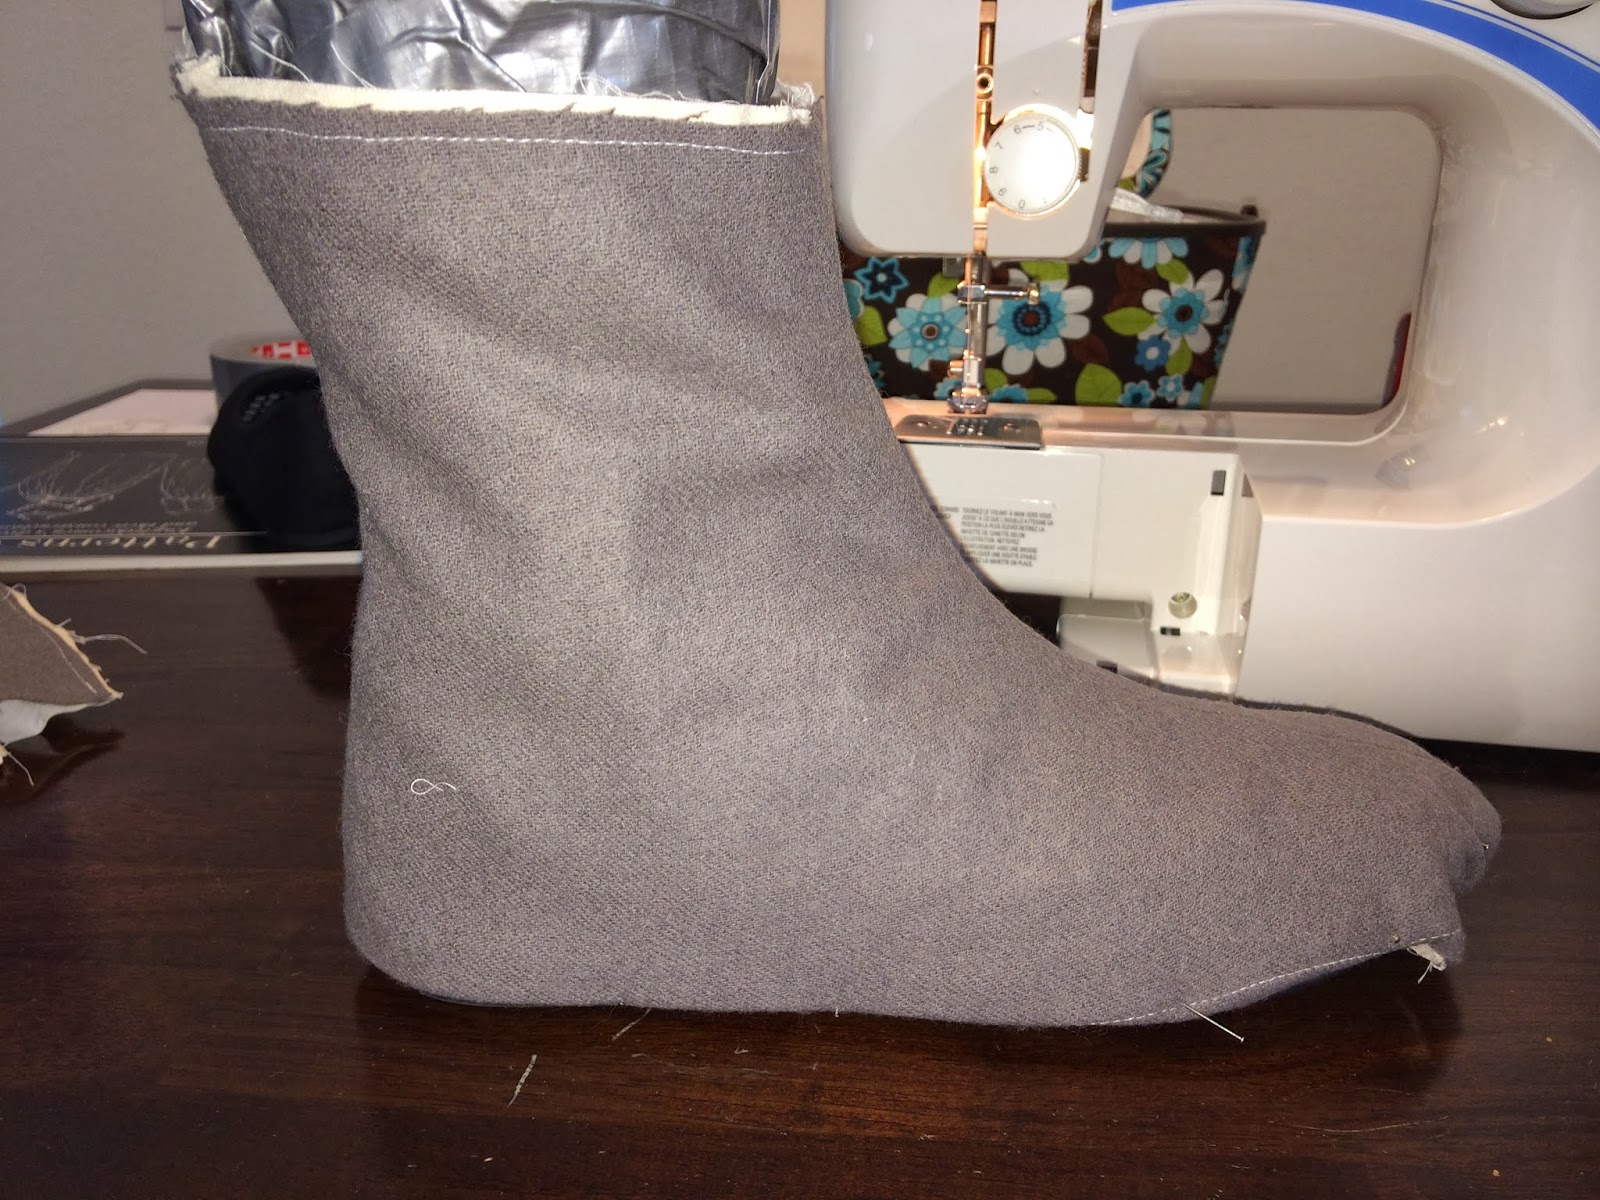
Elizabethan Costuming Page.  Super useful resource of someone just getting started in the era. I'll be wearing one of my Michaels straw hats to keep me shaded. I won't say cool because I know I'm just going to be melting all day.  Ill also be wearing a petticoat and my "boots" I made for civil war era. I'm not ready to shell out a ton of cash for period shoes yet.

You may be wondering why I'm doing all this. I've been asking myself this as I sew frantically during nap time that's only 30 minutes long. My husband, son and myself will be going to Big Bear for the Ren Faire. I'm excited to be getting to head to a period event. I didn't even want to go without a costume.

The faire was a little small and it rained. Bonus for me because I think Id have been really hot. Bad thing on the second day it got rained out and I couldn't get my money back for the weekend passes my hubs bought. The outfit wore pretty well. I split the seams on the sleeves because i whip sticked them. Other than that it was fun!

Thursday, February 20, 2014

1840 "Boots": Complete?

 
I have been being extremely lazy these days. And who could blame me I feel like I'm about to explode... But I digress, here is what I'm hoping will be the finished boots.


And yes I can actually put them on and walk in them. Stunned? Me too. The sad part is that I don't think I'll make it to Dickens. I'll never forgive myself if I'm in Riverside and go into labor. We will have to see what my midwife says.  : (
 
 
I was toying with the idea of adding a piece of suede onto the toe. But I don't know if I care enough at this point. Especially after the struggle I had sewing the upper to the flat. I broke two carpet needles and have various puncture wounds. As usual I sacrificed blood to my project.


Wednesday, February 5, 2014

1840's "Boots" Update

So I took a little hiatus from doing too much sewing due to a horrible tooth ache. So I haven't much to show but here's what I have so far.


The flats I got from Payless. I paid more than I wanted to but they fit well enough. And just between you and me, I was anxious to start the project.


Here we are sewn together and pinned on the flats for a sneak peek.
 

After marking off the holes for my grommets I closed my eyes and punched holes.

 
And luckily it turned out ok. A little crooked in some spots but hey. Who cares?! I also sewed on the black grosgrain ribbon and covered the metal grommets with buttonhole thread. Next to figure out where to sew in the "tongue" to fill the gap behind the lacing. And finally to attach them to the flats.


Saturday, February 1, 2014

Shoot for the moon!

 
So I kinda have a crazy idea.......I want to make some boots.
Whew! I said it, err typed it.


I had found a pair of booties at Wal-Mart for super cheap that I thought would work well for a day's use. Well turns out they are out of stock in every size. Which is beyond me because they were not attractive. But then I had a thought, maybe I could make my own 1840's style boot. So here is what I've though up initially. The idea will be to take a cheap pair of flats and make an upper to be sewn onto them.


So here are the three generations of the pattern I mocked up last night. I used my Roper boots to start and traced those. Then I sewed the first pattern and made adjustments from there for a better shape. I've left the toe portion square in order to fit it onto the flats I buy.
 
 And today I made a "cast" of my foot with duct tape and cling wrap. I stuffed it with printer paper to give it weight.
 I almost let myself cannibalize a pair of flats I already own but decided I liked them too much.


Lastly the upper I've put together. This one is made of canvas with muslin lining and exterior. I still need to decided exactly where I'll place the lacing on the side. The reason I made the cast of my foot and calf.  I intend to go and get fabric today and I'm thinking maybe a grey or black wool and grosgrain ribbon to line the edges.


Here are some extant examples that I was looking at while making the pattern. I've discarded the idea that I'll get a square toe or an exact replica of the shape. But it's fun to give it a try. Wish me luck!
 

Friday, January 31, 2014

1840 day Dress Reloaded: Houston we have a problem.......err problems?

Today I completed the sleeve jockeys and sewed both those and the sleeves in. Feeling very confident I put it on pinning the back at the top for fit. I even put on my ruffled petti for good measure. But lo and behold there it was staring me in the face.
 
 Giant, massive, scary shoulders. #FacePalm.
The bodice is sized well for my waist and so on but across the shoulder it's simply too wide. And it ruins the entire affect.
 

Here it is pinned up looking slight less hideous. I'm faced with the choice of A) Taking apart the bodice at the shoulder and taking up an inch or so all over or B) Simply take up more fabric at the arm hole. I'm not sure what to do at this point. Either way the sleeves need to come off again so I can do that right away. But I may take the night to sleep on it and see what to do tomorrow.
 

As a side not I also tried to put on my shoes I had planned to wear with this. And those don't fit either! I put in my order for my Gettysburg's from American Duchess. But those wont be ready until some time in April. #FacePalm. 


Tuesday, January 28, 2014

The Sleeve Jockey

 
Today I cut and sewed my sleeves for the 1840 Day Dress: Reloaded. Fairly simple today just sewed them initially with a1/2 in seam allowance and then pinned them to fit. Using my tailor chalk I removed the pins I had placed, marked the line and sewed the new seam. I usually tailor my sleeves this way because I find that the pattern usually is too large.


I also spent some time pulling together some extant examples of sleeve jockeys that I liked.


This last example being my favorite but alas I think I'll save this for if I ever get the courage to make a repro of the dress.


I made two test samples to see how they looked. I really liked the first example with the ruffle and piping.
 

 It would figure that I like the one that took longer and was a bit of a pain to sew on the machine. Just to add I also used a 1 inch seam allowance to take up some slack. It may have taken up too much so perhaps I'll use 3/4 in instead.